Installation and Setup of the "Zabbix" for monitoring your IT infrastructure
The complete guide to install and setup Zabbix 6.0 LTS Server On Linux (Ubuntu/debian)


Here is the complete guide to download and install Zabbix 6.0 LTS Server On UBUNTU 18.04
(Server,Frontend and Agent with webserver as nginx)
But before starting with installation we must understand what is Zabbix ?
Zabbix is an open-source software tool to monitor IT infrastructure such as networks, servers, virtual machines, and cloud services. Zabbix collects and displays basic metrics.
Note- Run the following command as a prerequisite to install nginx and mysql in your system:
sudo apt update && sudo apt-get upgrade -y
sudo apt install nginx
sudo apt install mysql-server
Now let's go with step by step process to install zabbix.
Install Zabbix repository.
wget https://repo.zabbix.com/zabbix/6.0/ubuntu/pool/main/z/zabbix-release/zabbix-release_6.0-4%2Bubuntu18.04_all.deb
sudo dpkg -i zabbix-release_6.0-4+ubuntu18.04_all.deb
sudo apt update
Install Zabbix server, frontend, agent.
apt install zabbix-server-mysql zabbix-frontend-php zabbix-nginx-conf zabbix-sql-scripts zabbix-agent- Create initial database.
Make sure you have database server up and running.
Then Set the password for the root then create a user and password named zabbix for localhost.mysql -uroot -p Enter password <DBPassword> mysql> create database zabbix character set utf8mb4 collate utf8mb4_bin; mysql> create user zabbix@localhost identified by '<your_password>'; mysql> grant all privileges on zabbix.* to zabbix@localhost; mysql> quit;sudo zcat /usr/share/doc/zabbix-sql-scripts/mysql/server.sql.gz | mysql --default-character-set=utf8mb4 -uzabbix -p zabbix Configure the database for Zabbix server. For that go to the directory where our database is installed i.e
cd /etc/zabbixand run the commandsudo nano zabbix_server.confto edit file zabbix_server.conf and uncomment the DBPassword directive and put the password of your DB named zabbix here.
DBPassword=<your_password>Configure PHP for Zabbix frontend. So edit the file in /etc/zabbix/nginx.conf and uncomment & set 'listen' and 'server_name' directives.
sudo nano /etc/zabbix/nginx.conflisten 8080; server_name example.com;Start Zabbix server and agent processes and make it start at system boot.
sudo systemctl restart zabbix-server zabbix-agent nginx php7.2-fpm
sudo systemctl enable zabbix-server zabbix-agent nginx php7.2-fpm
Now Open
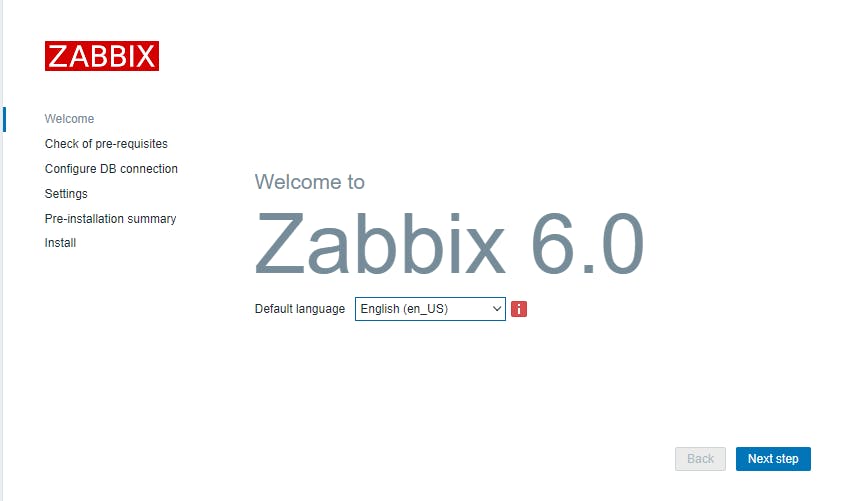
http://<your-IP-address>:8080(but make sure that you allowed the port in inbound rules of security group.)- You will be welcome from zabbix.
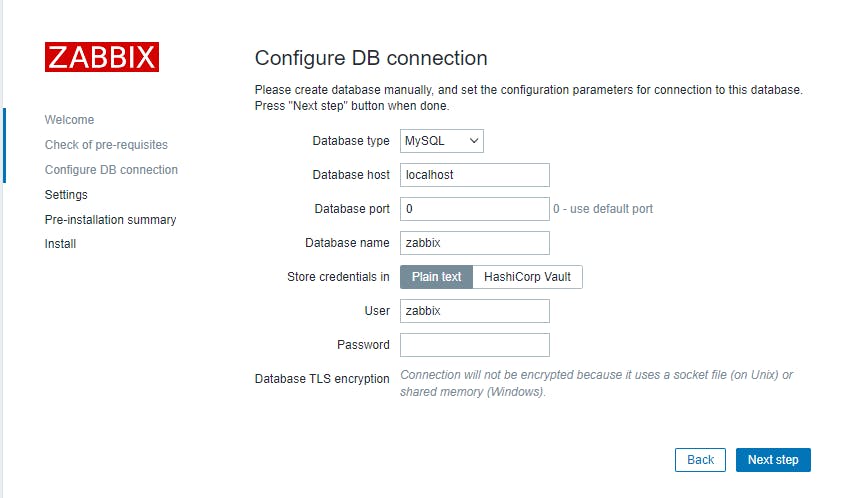
- Configure the mysql database and some settings.
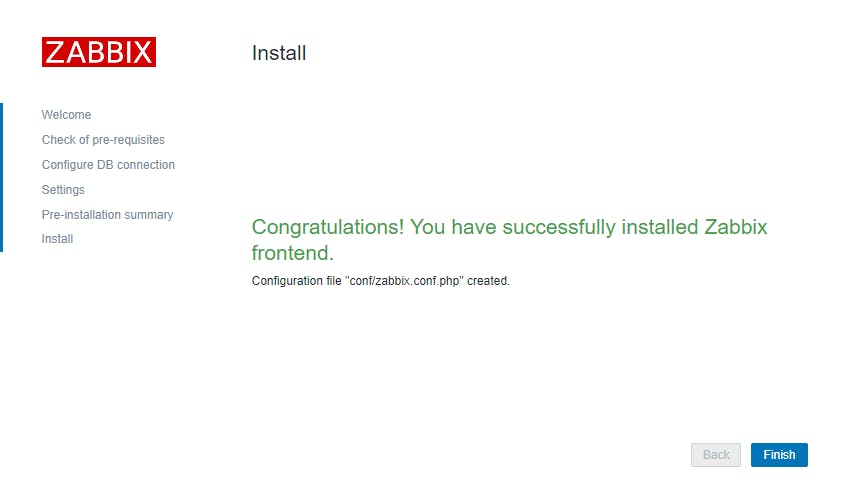
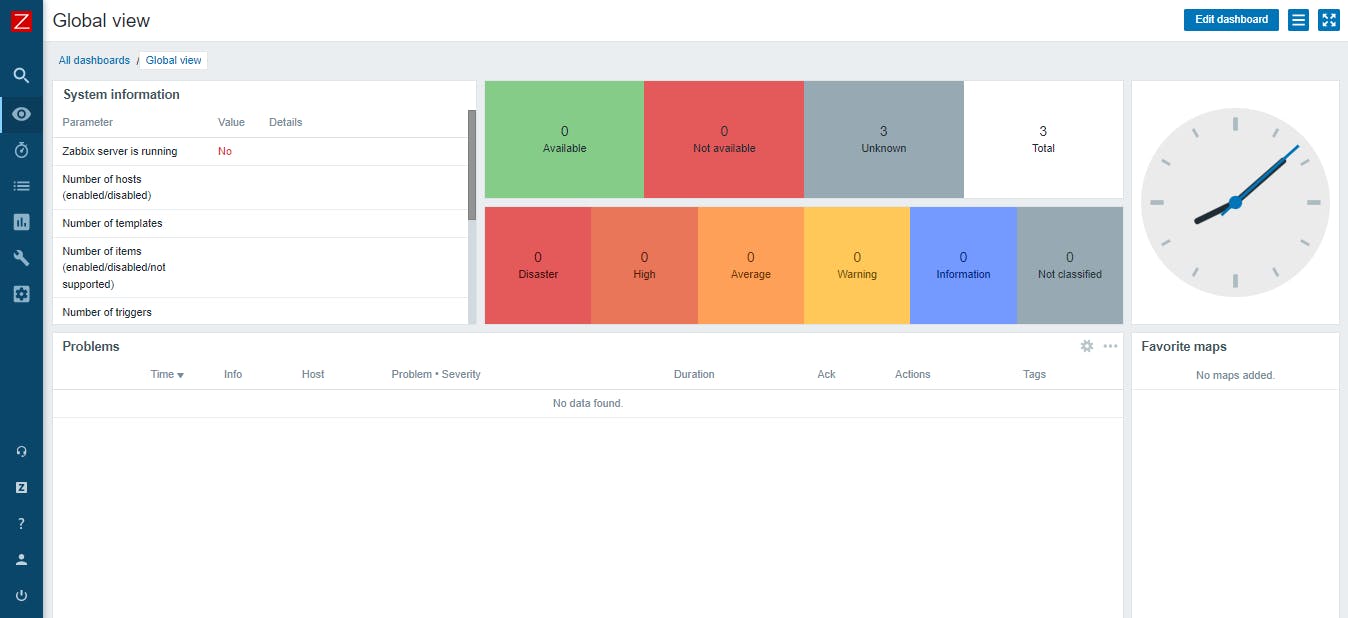
- Congratulations your Zabbix is installed.
- Enter the username as 'Admin' & password as 'zabbix' to login as a Zabbix superuser
Zabbix for first time(you must change it later).
- You will be welcome from zabbix.
Adding users into zabbix.
To view information about users, go to Administration → Users. To add a new user, click on Create user.
In the new user form, make sure to add your user to one of the existing user groups, for example 'Zabbix administrators. For Further learning, follow the below link: